Tuesday, December 29, 2015

OWA for SP2013 Part-3 ( Configure Office Web Apps for SharePoint 2013 )

Configure Office Web Apps for SharePoint 2013


Check the following before configuring it
  • Install SharePoint 2013.
  • Make sure all SharePoint 2013 web applications use claims-based authentication. Office Web Apps rendering and editing won’t work on SharePoint 2013 web applications that use classic mode authentication.
  • To enable users to edit (not just read) Office documents in a web browser, you’ll need an editing license. Also, you’ll need to enable editing on the Office Web Apps Server farm.
  • If you log on to SharePoint 2013 by using the System Account, you won’t be able to test the connection between SharePoint 2013 and Office Web Apps Server. Log on with a different account to test the connection.
  • Low memory conditions can cause Office document previews to fail in Office Web Apps
 Choose one of the following sections depending on whether you want to use HTTP or HTTPS. HTTP is generally recommended only for test environments. In production environments, the more secure HTTPS protocol is the better choice.

In a test environment that uses HTTP


For this configuration, make sure you have set up Office Web Apps Server .Be sure to configure the Office Web Apps Server farm to use an internal URL and HTTP.

For this configuration, make sure you have set up Office Web Apps Server .Be sure to configure the Office Web Apps Server farm to use an internal URL and HTTP.

Step 1: Open an elevated SharePoint 2013 Management Shell


Choose the procedure that corresponds to your server operating system.
In Windows Server 2008 R2
Click Start > All Programs > Microsoft SharePoint 2013 Products.  Right-click SharePoint 2013 Management Shell, and click Run as administrator.

In Windows Server 2012
Press the Windows logo key + Q, or swipe in from the edge of the screen to show the charms, and then click Search to see all the applications that are installed on the computer.
Right-click SharePoint 2013 Management Shell to display the app bar.
In the app bar, click Run as administrator.

Step 2: Create the binding between SharePoint 2013 and Office Web Apps Server


Run the following command, where <WacServerName> is the fully qualified domain name (FQDN) of the URL that you set for the internal URL. This is the point of entry for Office Web Apps Server traffic. For this test environment, you need to specify the –AllowHTTP parameter to allow SharePoint 2013 to receive discovery information from the Office Web Apps Server farm by using HTTP. If you don’t specify –AllowHTTP, SharePoint 2013 will try to use HTTPS to communicate with the Office Web Apps Server farm, and this command won’t work.
New-SPWOPIBinding -ServerName <WacServerName> -AllowHTTP 
After running this command, you should see a list of bindings displayed at the Windows PowerShell command prompt.

Step 3: View the WOPI zones for the SharePoint bindings

Office Web Apps Server uses zones to determine which URL (internal or external) and which protocol (HTTP or HTTPS) to use when it communicates with the host, in this case, SharePoint 2013. By default, SharePoint Server 2013 uses the internal-https zone. Run the following command to see what your current zone is.
Get-SPWOPIZone
The WOPI zone displayed by this command should be internal-http. If it’s displayed correctly, skip to step 5. If it isn’t, see the next step. 

Step 4: Change the WOPI zone to internal-http


If the result from Step 3 was internal-https, run the following command to change the zone to internal-http. You need to make this change because the zone of SharePoint 2013 must match the zone of the Office Web Apps Server farm.

Set-SPWOPIZone -zone "internal-http" Verify that the new zone is internal-http by running Get-SPWOPIZone again. 
Step 5: Change the AllowOAuthOverHttp setting in SHarePoint 2013 to true   To use Office Web Apps with SharePoint 2013 over http in a test environment, you need to set AllowOAuthOverHttp to true. Otherwise OWA won't work. You can check status by running following command. 
( Get-SPSecurityTokenServiceConfig).AllowOAuthOverHttp
If this command returns False, run the following commands to set this to True.

$config = (Get-SPSecurityTokenServiceConfig)
$config.AllowOAuthOverHttp = $true

$config.Update()

Run the following command again to verify that AllowOauthHttp setting is now set to true 
(Get-SPSecurityTokenServiceConfig).AllowOAuthOverHttp   
Step 6: Verify that Office Web Apps is working 
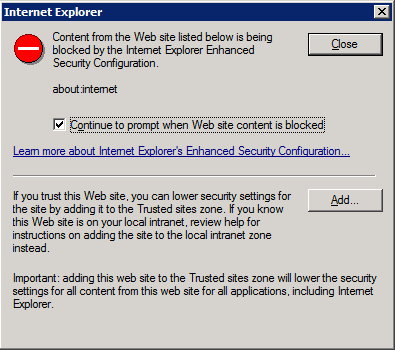
In SharePoint 2013, make sure you are not logged on as system account because you won't be able to edit or view the documents with OWA. Go to a SP2013 document library that contains Office documents and view a word, powerpoint, excel, or OneNote file. The documents should open in a browser that displays the file by using OWA.


In a production environment that uses HTTPS


Before you start the following procedures, make sure that you have set up Office Web Apps Server.

Step 1: Open the SharePoint 2013 Management Shell


Choose the procedure that corresponds to your server operating system.
In Windows Server 2008 R2
1.     Select Start > All Programs > Microsoft SharePoint 2013 Products.
2.     Right-click SharePoint 2013 Management Shell to display the shortcut menu, and click Run as administrator.
In Windows Server 2012
1.     Press the Windows logo key + Q, or swipe in from the edge of the screen to show the charms and then click Search to see all the applications that are installed on the computer.
2.     Right-click SharePoint 2013 Management Shell to display the app bar.
3.     In the app bar, click Run as administrator.

Step 2: Create the binding between SharePoint 2013 and Office Web Apps Server


Run the following command, where <WacServerName> is the fully qualified domain name (FQDN) of the URL that you set for the internal URL. This is the point of entry for Office Web Apps Server traffic.

New-SPWOPIBinding -ServerName <WacServerName>

Step 3: View the WOPI zone of SharePoint 2013


Office Web Apps Server uses zones to determine which URL (internal or external) and which protocol (HTTP or HTTPS) to use when it communicates with the host, which in this case is SharePoint 2013. By default, SharePoint Server 2013 uses the internal-https zone. Verify that this is the current zone by running the following command.

Get-SPWOPIZone     ( Take note of WOPI zone that is displayed )

Step 4: Change the WOPI zone if necessary


Depending on your environment, you might have to change the WOPI zone. If you have a SharePoint farm that's both internal and external, specify external. If you have a SharePoint farm that's internal only, specify internal.
If the results from Step 3 show that internal-https and the SharePoint farm is internal only, you can skip this step. If you have a SharePoint farm that’s internal and external, you need to run the following command to change the zone to external-https.

Set-SPWOPIZone -zone "external-https"

Step 5: Verify that Office Web Apps is working


In SharePoint 2013, make sure you aren’t logged on as System Account because you won’t be able to edit or view the documents with Office Web Apps. Go to a SharePoint 2013 document library that contains Office documents and view a Word, PowerPoint, Excel, or OneNote file. The document should open in a browser that displays the file by using Office Web Apps.

OWA for SP2013 Part-4(TroubleShooting some Issues)

Troubleshoot errors in Office Web Apps when it is used with SharePoint 2013


If Office Web Apps isn’t working correctly when it is used together with SharePoint 2013, locate the symptom below and expand the heading to find troubleshooting steps.

Problem: When you select the "new document" link in a SharePoint library, you’re prompted to upload a document instead of having the option to create a new Office document. Choosing (single-clicking) an Office document opens the file in the client application. Previews of Office documents are not displayed.


Here are some troubleshooting options to try.

Verify that claims-based authentication is used by the SharePoint web application that is used to create the new document
Only web applications that use claims-based authentication can open files in Office Web Apps. To determine the authentication provider for a web application, follow these steps:
1.     In SharePoint 2013 Central Administration, click Manage web applications.
2.     Select the web application that you want to check, and click Authentication Providers on the ribbon.
The authentication provider must be displayed as Claims Based Authentication for Office Web Apps to work correctly with the web application. To resolve this issue, you can delete the web application and recreate it using claims-based authentication, or you can change the authentication method of the web application.
Make sure the WOPI zones match on the SharePoint 2013 and the Office Web Apps Server farm.
To do this, run the following command on the SharePoint Server:
Get-SPWopiZone 
The result will be one of the following:.
·         internal-https
·         internal-http
·         external-https
·         external-http
Next, run the following command on the SharePoint Server.
Get-SPWOPIBinding
In the output, look for WopiZone: zone. If the results from Get-SPWopiZone don’t match the zone that is returned by Get-SPWOPIBinding, run the Set-SPWOPIZone -Zonecmdlet on the SharePoint Server to change the WOPI zone to match the result from Get-SPWOPIBinding

Problem: You receive a “Sorry, this document can’t be opened for editing” error when you try to edit an Office document in Office Web Apps.


In some situations, users that are members of Active Directory (AD) Security Groups may be unable to edit documents in the browser. The solution is to ensure the User Profile Service Application (UPA) is properly configured and fully synchronized with user and group memberships.

Problem: You receive a "Sorry, something went wrong" error when you try to view an Office document in Office Web Apps.


Make sure you’re not logged in as System Account because you won’t be able to edit or view a document. Log on as a different user and try to access Office Web Apps again.

Problem: You receive a "Sorry, there was a problem and we can't open this document" error when you try to view an Office document in Office Web Apps.


If you set up Office Web Apps in a test environment that uses HTTP, make sure you set the AllowOAuthOverHttp setting to True as described in step 5: Change the AllowOAuthOverHttp setting in SharePoint to true.

If you added domains to the Allow List by using the New-OfficeWebAppsHost  cmdlet, make sure you’re accessing Office Web Apps from a host domain that’s in the Allow List. To view the host domains in the Allow List, on the Office Web Apps Server open the Windows PowerShell prompt as an administrator and run the Get-OfficeWebAppsHost  cmdlet. To add a domain to the Allow List, use the New-OfficeWebAppsHost  cmdlet.

Problem: You receive a "Sorry, Word Web App can't open this document because the service is busy. Please try again later" error when you try to view an Office document in Office Web Apps.


·         Did you install Office Web Apps Server on a domain controller, by chance? Unfortunately, Office Web Apps Server can’t run on a domain controller. Office Web Apps Server must be installed on a separate server that’s part of a domain.
·         Make sure you’re running SharePoint 2013 build 15.0.4420.1017 or later. On the SharePoint 2013 server, follow these steps to verify the build number:
1.     Go to Start > All Programs > Microsoft SharePoint 2013 Products > SharePoint 2013 Central Administration.
2.     Choose System Settings > Manage servers in this farm.
Verify the Configuration database version is 15.0.4420.1017 or higher

Problem: You receive a "File Not Found. The URL of the original file is not valid or the document is not publicly accessible. Verify the URL is correct, then contact the document owner" error when you try to view an Office document in Office Web Apps by using a user generated URL.


Are you trying to open a document that has a file size that is larger than 10 megabytes from a user generated URL? Make sure the document doesn’t exceed 10 megabytes.

Problem: Previews of Office documents don't appear in SharePoint 2013. Instead, they show the "This content cannot be displayed in a frame" error.


Low memory conditions can cause problems with Office document previews. Take a look at the Hardware requirements—web servers, application servers, and single server installations to see the memory requirements for SharePoint 2013. These are the same requirements used by Office Web Apps Server.

Problem: You receive “A data connection is set to always use connection file and {0:ExcelWebApp} does not support external connection files. The following connection failed to refresh: Data connections” error.


This happens because Office Web Apps Server doesn’t support the Office Data Connection (ODC) file that stores the data connection information. To fix this problem, follow these steps:
1.     Open the workbook in an Excel client application.
2.     Click Data > Connections.
3.     Select the data connections listed in the message, and click Properties.
4.     Click the Definition tab.
5.     Clear the Always use connection file check box for check box.
6.     Re-upload the workbook to the SharePoint document library.
To enable people to interact with workbooks that contain a Data Model or Power View views in a browser window, configure Excel Services in SharePoint Server to display workbooks. This requires a SharePoint administrator to run the New-SPWOPISupressionSetting cmdlet on the server where SharePoint Server is installed.

Disconnect SharePoint 2013 from Office Web Apps Server


If, for any reason, you want to disconnect SharePoint 2013 from Office Web Apps Server, use the following command example.

Remove-SPWOPIBinding -All:$true

Failed Requests Tracing in IIS 7

Troubleshooting Failed Requests Using Tracing in IIS 7

Introduction

Request-based tracing is available both in stand-alone IIS Servers and on Windows Azure Web Sites (WAWS) and provides a way to determine what exactly is happening with your requests and why, provided that you can reproduce the problem that you are experiencing. Problems like poor performance on some requests, or authentication-related failures on other requests, or the server 500 error from ASP or ASP.NET can often be difficult to troubleshoot--unless you have captured the trace of the problem when it occurs. the following article discusses failed request tracing on IIS Server.

Failed-request tracing is designed to buffer the trace events for a request and only flush them to disk if the request "fails," where you provide the definition of "failure". If you want to know why you're getting 404.2 error messages or request start hanging, use failed-request tracing.
The tasks that are illustrated in this article include:
·         Enabling the failed-request tracing module
·         Configuring failed-request tracing log-file semantics
·         Defining the URL for which to keep failed request traces, including failure definitions and areas to trace
·         Generating the failure condition and viewing the resulting trace

Prerequisites

INSTALL IIS

You must install IIS 7 or above before you can perform the tasks in this article. Browse to http://localhost/ to see if IIS is installed. If IIS is not installed, see Installing IIS on Windows Server 2008 for installation instructions. When installing IIS, make sure that you also install the following:
·         ASP.NET (under World Wide Web Services - Application Development Features - ASP.NET)
·         Tracing (under World Wide Web Services - Health and Diagnostics - Tracing)

LOG IN AS ADMINISTRATOR

Ensure that the account that you use to log in is the administrator account or is in the Administrators group.
Note: Being in the Administrators group does not grant you complete administrator user rights by default. You must run applications as Administrator, which you can do by right-clicking on the application icon and selecting Run as administrator.

MAKE A BACKUP

You must make a backup of the configuration before doing the following tasks.
To make a backup of the configuration:
1.       Click Start -> All Programs -> Accessories.
2.       Right-click Command Prompt, and then click Run as administrator.
3. In a command prompt, run the following command:
%windir%\system32\inetsrv\appcmd add backup cleanInstall

CREATE SAMPLE CONTENT

1.       Navigate to %systemdrive%\inetpub\wwwroot.
2.       Move the content to a secure location (in case you want to restore the existing content) or delete it.
3.       Create a blank file and name it test.asp.
4.       In the command prompt, navigate to the test.asp file in \inetpub\wwwroot.
5.       In the test.asp file, paste the following content:
<h2>Failed Request Tracing Lab</h2><br>
<br>Today's date is <% response.write(Date()) %>

DISABLE ASP

ASP must be disabled for this task. ASP is disabled only as an example and for the purposes of the tasks in this article.
To disable ASP:
1.       Open IIS Manager.
2.       Double-click ISAPI and CGI Restrictions.


3. Select Active Server Pages. In the Actions pane, click Deny to disable ASP.

Enable Failed-Request Tracing

After you enable failed-request tracing, you need to configure where the log files will reside. In this task, you will enable failed-request tracing for the Default Web Site and specify where to put the log files. You will then configure the failure for which to generate failure logs.

STEP 1 : ENABLE FAILED-REQUEST TRACING FOR THE SITE AND CONFIGURE THE LOG FILE DIRECTORY

1.        Open a command prompt with administrator user rights.
2.        Launch inetmgr.
3.        In the Connections pane, expand the machine name, expand Sites, and then click Default Web Site.
4.        In the Actions pane, under Configure, click Failed Request Tracing….


5. In the Edit Web Site Failed Request Tracing Settings dialog box, configure the following:
·         Select the Enable check box.
·         Keep the defaults for the other settings.

6. Click OK.
Failed-request tracing logging is now enabled for the Default Web Site. Check the %windir%\system32\inetsrv\config\applicationHost.config file to confirm that the configuration looks as follows:
<system.applicationHost>
   <sites>
      <!-- site & app defaults -->
      <site name="Default Web Site" id="1">
         <!-- other site configuration -->
         <traceFailedRequestsLogging  enabled="true" />
      </site>
   </sites>
</system.applicationHost>

STEP 2 : CONFIGURE YOUR FAILURE DEFINITIONS

In this step, you will configure the failure definitions for your URL, including what areas to trace. You will troubleshoot a 404.2 that is returned by IIS for any requests to extensions that have not yet been enabled. This will help you determine which particular extensions you will need to enable.
1.       Open a command prompt with administrator user rights.
2.       Launch inetmgr.
3.       In the Connections pane, expand the machine name, expand Sites, and then click Default Web Site.
4.       Double-click Failed Request Tracing Rules.

5. Click Finish.
6. In the Actions pane, click Add....
7. In the Add Failed Request Tracing Rule wizard, on the Specify Content to Trace page, select All content (*). Click Next.


8. On the Define Trace Conditions page, select the Status code(s) check box and enter 404.2 as the status code to trace.


9. Click Next.
10. On the Select Trace Providers page, under Providers, select the WWW Server check box. Under Areas, select the Securitycheck box and clear all other check boxes. The problem that you are generating causes a security error trace event to be thrown. In general, authentication and authorization (including ISAPI restriction list issues) problems can be diagnosed by using the WWW Server – Security area configuration for tracing. However, because the FREB.xsl style sheet helps highlight errors and warnings, you can still use the default configuration to log all events in all areas and providers.
Under Verbosity, select Verbose.


11. Click Finish. You should see the following definition for the Default Web Site:


IIS Manager writes the configuration to the %windir%\system32\inetsrv\config\applicationHost.config file by using a <location> tag. The configuration should look as follows:
    <location path="Default Web Site">
        <system.webServer>
            <tracing>
                <traceFailedRequests>
                    <add path="*">
                        <traceAreas>
                            <add provider="WWW Server" areas="Security" verbosity="Verbose" /> 
                        </traceAreas>
                        <failureDefinitions statusCodes="404.2" />
                    </add>
                </traceFailedRequests>
            </tracing>
        </system.webServer>
    </location>

Test and View the Failure Request Log File

In this task, you will generate a failed request and view the resulting trace log. You already configured IIS to capture trace logs for http://localhost/*.asp requests that fail with an HTTP response code of 404.2. Now verify that it works.

STEP 1 : GENERATE AN ERROR AND THE FAILURE REQUEST LOG FILE

1.       Open a new Internet Explorer window.
2.       Type in the following address: http://localhost/test.asp.
3.       You should see the following:

STEP 2 : VIEW THE FAILURE REQUEST LOG FILE

1.       Now that you have generated a failed request, open a command prompt with administrator user rights and navigate to %systemdrive%\inetpub\logs\FailedReqLogFiles\W3SVC1.
2.       Run start to start an Internet Explorer window from the directory.


3. Notice a few things here: When IIS writes the failed request log file, it writes one file per failed request. A freb.xsl style sheet is also written, one per directory. This helps when you view the resulting failure request log files (such as fr000001.xml above).
4. Right-click the log file for the 404.2 error, and click Open With -> Internet Explorer. If this is the first time that you are opening a Failed Request Tracing file, you must add about:internet to the list of trusted sites, since Internet Explorer's Enhanced Security Configuration is enabled by default. If this is the case, you will see the following:


5. In the Internet Explorer dialog box, click Add… to add about:internet to the list of trusted sites. This allows the XSL to work. You will see the following after adding about:internet to the list of trusted sites:


A summary of the failed request is logged at the top, with the Errors & Warnings table identifying any events that are WARNING, ERROR, or CRITICAL ERROR in severity. In this example, the WARNING severity level is due to ISAPI RESTRICTION. The image that you tried to load was %windir%\system32\inetsrv\asp.dll.
6. Open the raw XML file directly by using a text editor, and look at the contents of each event.

Summary

You have completed two tasks: configured failed request tracing to capture traces for * if IIS returns it with a 404.2 status code; and verified that IIS captured the trace for your request. You also verified that the freb*.xml log file did not contain any other requests for the requests that you made because the requests did not have a 404.2 return code. When you consult the failure log file, you determined that the cause of the failure was that the extension was disabled for that request. You can try other non-HTML pages (like gifs or jpgs) and note that the log file does NOT add these traces. You can also easily change this to be 404, or capture the failure if the request takes longer than 30 seconds by setting the timeTaken field in your failureDefinitions.

Restore Your Backup

Now that you have completed the tasks in this article, you can restore the backup of the configuration. Run the following command with administrator user rights:
%windir%\system32\inetsrv\appcmd restore backup cleanInstall