In
this article we will see all the settings available in our Document Library
& Lists in our New SharePoint 2013 site.
Go to your Library or List. On ribbon you can find List tools. Select List option and in right corner youcan see List settings. Select it. Same way for library as well.
Go to your Library or List. On ribbon you can find List tools. Select List option and in right corner youcan see List settings. Select it. Same way for library as well.

Let's go through them one after the other.
List name, description and navigation
Here you can provide a name, a brief description of the list or document library and a choice to put your list or document library on the quick launch.

Versioning Settings
Enabling the versioning settings help you to see the history of the documents or the list items.
We have options like:
- Requires content approval for
submitted items: If you choose Yes then once you have uploaded an item or
a document library it will be viewable in the list or the library once
approved.
- Create a version each time you
edit a file in this document library: You can enable the versions as
you would like in whole numbers or in decimals.
- Draft Item Security: If the
item is not published or is awaiting approval then you can choose from the
following options as to who can view it.
- Require Check Out: if you want
the document when it is being edited by someone to be checked out and that
other person will not edit it then you can choose the option Yes.


Advanced Settings
Advanced Settings have plenty of options for us to modify content types.
- Allow management of content
types: If you choose Yes you can view, modify the content type your
library or list is using.
- Document Template: You
can provide a location of this template to create another document
libraries and lists using this as a default template.
- Opening Documents in a Browser:
As the name suggests you can enable if you want to open the document in a
browser or a in a client application.
- Custom Send to Destination: You
can specify a name and the URL to which this library or list should refer
to.
- Folders: You can allow users to
create folders in your document libraries or lists.
- Search: You can enable or
disable a document library and its contents from search opions.
- Reindex Document Libray: By
clicking, on the next crawl you can have the contents reindexed.
- Site Assets Library: if a
person uploads an image or a wiki page then you can enable this so that
both images and the pages are saved into site assets.
- Quick Edit: if you enable a
quick edit then it helps you to edit a document library in bulk.
- Dialogs: when you open a
new or edit or view a form, if you want them in a separate dialog option
then you can choose Yes.


Validation Settings
Validation Settings are used if you want to provide the user to provide a specific kind of validation on their each submission of their documents or items.
Validation Settings are used if you want to provide the user to provide a specific kind of validation on their each submission of their documents or items.

Change Default Column Values
You can have a few columns that always have default values like " 0" or "True" and so on.

Rating Settings
You can enable ratings of the documents or list items in the form of stars and likes.

Audience Targeting Settings
When you enable this option it will create a new column where you can input the permission level and the content query web part will fetch values from the column and display data accordingly.

Form Settings
These settings are mainly used for configuring InfoPath forms, that we will see later in my upcoming articles.

Delete this Document Library

Save Document Library as Template
You can save the library or the list as a template that can be used again with the same fields, the same content types as well as if you include content it can also be added to the template.

Permissions for this document library
You can provide permissions to a document library if you don't want to inherit t from the site and provide unique permission to the list and library.

Manage files that have no checked in version
There are files that are checked out by other users, as a admin or the owner you can take ownership of those files and check in the documents.

Workflow Settings
Here you can view all the workflows created by the UI, SharePoint Designer and other third-party products such as Nintex.

Information management policy settings
By default, document libraries and lists will have a default content type like for Document library , Documents will be the content type similarly for Custom lists item will be the content type so it can be changed in here in the policy settings.

Enterprise Metadata and Keywords Settings
Here we have two types of settings.
- Add Enterprise keywords:
Enabling this feature will add a column to the library and the lists where
a user can define keywords for their documents and items to be searched.
- Metadata Publishing: You can
add tags to your items and documents to be used in your profile as social
tags.

Generate file plan report
If you generate the file plan report it will generate a report with all the details as below:


Columns
Then here we have columns where you can create, add , modify , order or index columns.
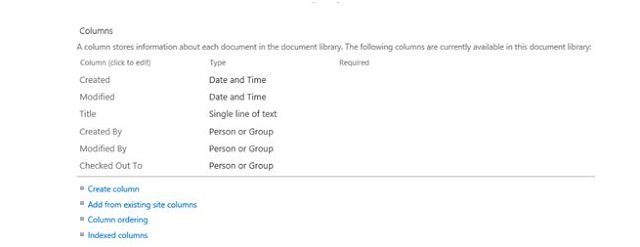
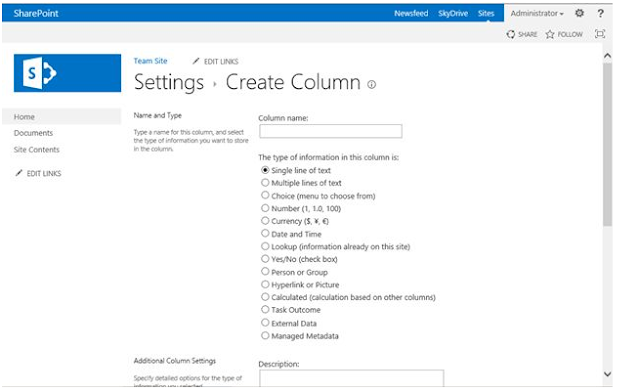
Create Column

Then here we have columns where you can create, add , modify , order or index columns.

Create Column


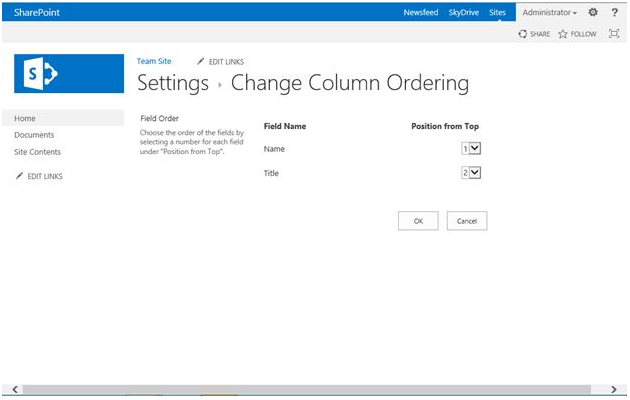
Columns Ordering
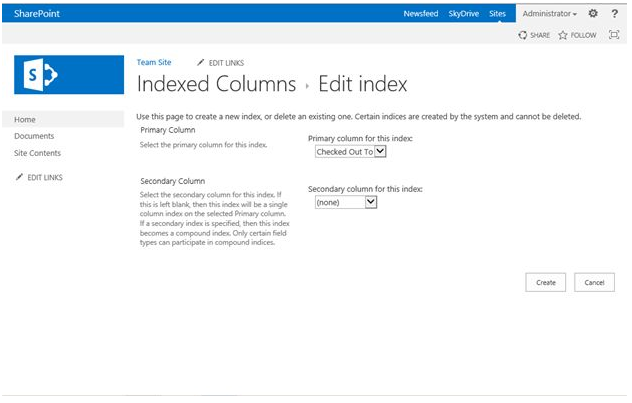
Indexed Columns
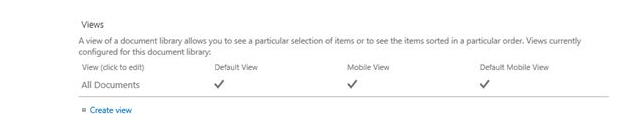
Views
Last but the most important, we can create as many views depending upon our
requirements.
Create, change, or delete a column
in a list or library


Columns help you group, categorize, and track information, such
as the department name or project number. From a browser, you have many options
for the type of column that you create. They include columns such as a single
line of text, a drop-down list of options, and a number that is calculated from
other columns, or even the name and picture of a person on your site.
There are columns for
a site, just like there are columns for lists and libraries. You can add a site
column to a list or library. You might do this if the column that you want for
a list or library already exists as a site column.
To create a column for
a list or library you must have at least the permissions obtained by being
added to the default Designers SharePoint group for the site.
What do you want to do?
The following
procedure starts from the list or library page to which you want to add the
column. If the list or library is not already open, click its name on the Quick
Launch. If the name of your list or library does not appear, click Site Contents, and then click the name of your list or
library.
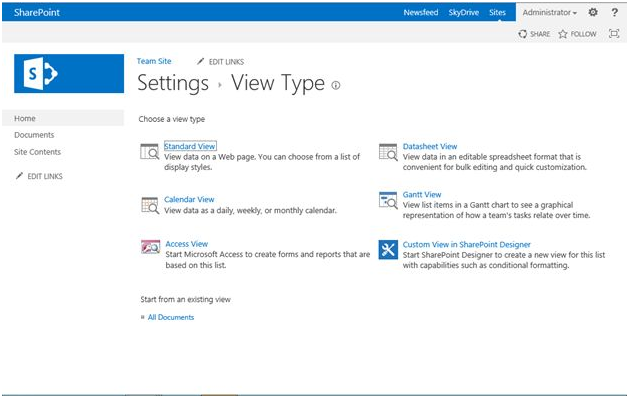
1.
In the ribbon, click
the List or Library tab.
2.
In the Manage Views group, click Create Column.
3.
In the Name and Type section, type the name that you want for the
column in the Column name box.
4.
Under The type of information in this column is, select the type of information that you want
to appear in the column.

5.
In the Additional Column Settings section, type a description in the Description box to help people understand the purpose of
the column and what data it should contain. This description is optional.
Depending on the type
of column that you selected, more options may appear in the Additional Column Settingssection. Select the additional settings that
you want.
1.
If you want the data
in the column validated, click Column Validation to expand, and type the Formula that you want to use to validate the data, and type the User message that you want to provide users to help them
type valid data. The Column Validation section is not available for all types of
columns.
2.
Click OK.
1.
If the list or library
is not already open, click its name on the Quick Launch.
If the name of your
list or library does not appear, click Site Contents, and then click the name of your list or library.
2.
In the ribbon, click
the List or Library tab.
3.
In the Settings group, click List Settings or Library Settings.

4.
On the Settings page, in the Columns section, click Add from existing site
columns.
5.
On the Add Columns
from Site Columns page, in the Select Columns section, select the group of site columns to
choose from in the Select site columns
from drop-down
list.
When you select a
column group from the list, the available site columns appear in the Available site columnslist.

6.
Select the site
columns you want to add and click Add. To add the column to
the default view, which people on your site automatically see when they first
open a list or library, make sure Add to default view is selected. Some lists such as the Tasks list also have the
option Add to all content types, which is selected by default. If you want to
add the column to all content types, make sure Add to all content types remains
selected.
Depending on the type
list or library, there may be more settings in the Options section. Select the
additional options that you want.
7.
Click OK.
You can change the
settings for a column, such as the name of the column. Depending on the type of
column and the type of list, you can make additional changes, such as how much
text a user can enter. Programs such as SharePoint Designer offer even more options
for modifying columns, such as specifying the column width.
1.
If the list or library
is not already open, click its name on the Quick Launch.
If the name of your
list or library does not appear, click Site Contents, and then click the name of your list or library.
2.
In the ribbon, click
the List or Library tab.
3.
In the Settings group, click List Settings or Library Settings.
4.
On theList Settings or Library Settings page, in the Columns section, click the name of the column that you
want to change.

5.
Change the settings
that you want, and then click OK.
This
procedure deletes the column and any data in the column. Once you delete a
column, you cannot restore the column from the Recycle Bin.
1.
If the list or library
is not already open, click its name on the Quick Launch.
If the name of your
list or library does not appear, click Site Contents,
and then click the name of your list or library.
2.
In the ribbon, click
the List or Library tab. The name of the tab may vary depending on
the type of list or library. For example, if your list is a calendar, the name
of the tab is Calendar.
3.
In the Settings group, click List Settings or Library Settings.
4.
On the List Settings or Library Settings page, in the Columns section, click the name of the column that you
want to delete.
5.
Scroll to the bottom
of the Change Column page and then click Delete.
Lists and libraries
contain required columns that can’t be deleted, such as the Title or Name. If the column can’t be deleted, the Delete button is not available. If you can’t delete a column, but you
don’t want the column to appear in a view, you can remove it from the view.
6.
When prompted, click OK.